Capturing a Video File
A video booth is similar to a photo booth except instead of taking one or more stills pictures it captures a short video clip. Video booth shooting is available with all recent Canon cameras
The cameras can only capture video to the camera's memory card and so the camera must have a memory card with sufficient space in order to use the video booth mode (video files are automatically downloaded to the PC and deleted from the memory card after capture).
WARNING: If the camera's memory card is full the software will attempt to capture the video but will stall when it tries to download it to the PC. To avoid this problem please make sure there is plenty of free space on the memory card.
Please note: The camera must be set to photo mode not video mode.
Cameras with movie mode on the exposure mode dial should be set to P, Tv, Av or M.
Cameras that have a power switch with OFF, ON and MOVIE settings should be set to ON
Cameras with a photo/movie switch should be set to the photo setting
Capturing a Series of Still Photos to Create an Animated GIF
Video booth mode can also be used to capture a series of still photos which can be combined to create a short animated GIF that plays back in a continuous loop. Please see this section for details.
Overview
The video booth mode works in a similar way to photo booth mode. Users are presented with a ready screen with a live view display showing what the camera sees. When the user presses the start button a countdown screen is displayed together with countdown message. At the end of the countdown the capture screen is displayed together with a progress bar that shows how much time is remaining. After the video clip has been captured the processing screen is displayed and the movie file is automatically downloaded from the camera's memory card to the PC and then deleted from the memory card to make space for the next clip. After downloading the ready screen is displayed ready for the next video capture.
Video Booth Settings
The dialog below is displayed when "Video booth settings..." is selected from the File menu:
In order to use the video booth mode it must be enabled by selecting "Enable video in photo booth mode". Normally when you enter full screen photo booth mode (by typing Ctrl+F4) the photo booth ready screen will be displayed. If you wish to startup in video booth mode select the "Startup in video booth mode when selecting full screen photo booth" checkbox.
Select the "Hide live view during countdown and capture" to only display live view in the ready screen and avoid guests being distracted by the live view during video capture.
Select the "Display playback screen after capturing video" to allow users to play back the video and decide whether to accept it or reject it. The playback screen will be displayed until the user either accepts or rejects the video. When the video is rejected it is automatically deleted from the computer. When the "Start playback automatically" option is selected video playback will start automatically when the playback screen is displayed.
The playback screen will be displayed until either the user accepts or rejects the video or the timeout occurs. Use the "Playback screen timeout" setting to specify the length of the timeout and the "Timeout action:" dropdown to specify what happens when the timeout occurs.
Click on "Video postprocessing..." to configure the postprocessing applied to the video after it has been captured. Postprocessing options include resizing the video, adding an overlay, changing the playback speed or applying a custom edit list with speed ramping and jumpt cuts etc. Please see the section on Video Postprocessing for details.
The "Delay before playback" option allows time for additional processing of videos to be performed outside of DSLR Remote Pro before it processes the video. The delay can be cut short by sending Ctrl+Z to the photo booth. This allows the delay before playback to minimized by setting a long delay and arranging for Ctrl+Z to be sent when the processed video is ready.
Please note: You do not need to set the "Delay before playback" when using the postprocessing built into DSLR Remote Pro. You only need to use this setting if additional processing is to be applied outside of DSLR Remote Pro before it processes the video.
An optional video_confirmed.jpg screen can be displayed after the sharing screen (or after accepting playback when not sharing) by setting the "Confirmed screen display time". Set this to the number of seconds to display the video_confirmed.jpg screen or set it to 0 to disable the screen.
Use the "Duration of captured video clip" setting to specify the duration of the video clip in seconds. This can be any value up to 1200 seconds (20 minutes). Please note that users can end the recording before it reaches the preset duration by pressing the End key or "Stop video capture" touchscreen action.
Use the "Countdown before capturing video" setting to specify the length of the countdown before video capture starts. The countdown text is displayed during the countdown and is updated every second. The following tokens can be used:
@videoClipLength@ - the duration of the video clip in seconds
@videoCountdown@ - the number of seconds remaining before video capture starts
Use the "..." buttons after the font and font color displays to change the font and color of the countdown text.
The size and position of the video playback window can be set manually or set automatically by the program. If the height is set to 0 the program will automatically display the video playback at the same resolution as capture, or if this is to big to fit on the screen it will scale the size down to fit the screen. The video playback window is normally displayed at the top of the screen but can be moved down using the top offset setting if required. The video playback window left offset allows the horizontal position of the window to be specified. The default setting of -1 will center the video playback window on the screen.
Use the "..." buttons after the record/playback progress bar foreground and background color displays to change the colors of the progress bar displayed during recording and playback.
Note: the progress bar can be hidden by setting the foreground and background colors to the same values.
The size and position of the live view display uses the same settings as the stills photo booth and can be specified using the photo booth settings dialog. The various screens used by the video booth should be saved in the photo booth images folder which can also be specified using the photo booth settings dialog. Click on the "Photobooth Settings..." button to save the current video booth settings and display the photo booth settings dialog.
Click on the "Video postprocessing..." button to specify the postprocessing applied to videos:
Select "Enable video postprocessing" to enable the video post processing options. When postprocessing is applied to a video the original video captured by the camera is replaced with the processed video. Select "Copy original video to 'originals' subfolder" if you want to keep a copy of the original video.
The processed video can be cropped and resized using the "Cropping" and "Video height" settings. Cropping is applied first and then the video is resized. Set the "Cropping" dropdown list to "square" to crop the video to square e.g. crop a 1280x720 pixel video to 720x720 pixels. The "Video height" setting resizes the video maintaining its aspect ratio e.g. setting the height to 360 pixels will resize a 1280x720 pixel video to 640x360 pixels.
Set the "Cropping" dropdown list to "custom" and specify the crop width to apply custom cropping e.g. set the crop width to 960 to crop a 1280x720 pixel video with an aspect ration of 16:9 to 4:3 aspect ratio (960x720 pixels).
Note: The live view display will show the whole video not just the square cropped area. You can mask the live view to make it square by adding a video_live_view_overlay.png image to the photo booth images folder. Please see the Live View Overlay section for more information.
Select "Mirror video (flip horizontally)" to mirror the video. This is useful for videos where a piece of glass is placed between the camera and the guest and they write or draw on the glass.
Select the boomerang option to create a video that plays normally and then in reverse.
Specify the number of loops the video is played e.g. if you set the number of loops to 2 and select the boomerang option the processed video will be: forward video + backward video + forward video + backward video.
Set the playback speed to a value other than 1 to change the playback speed e.g. if the video was captured at 60fps setting the playback speed to 0.5 will produce a smooth, slowed down video played at half speed.
Select "Custom edit list" to create a video made of custom edits including speed ramping, jump cuts, forwards and backwards video. This option disables the boomerang, loops and playback speed options but allows you to apply more creative edits such as jump cuts and speed ramping.
Click on the "Edit..." button to edit the custom edit list:
Each entry in the video edit list has a start time, end time, start speed and end speed.
The start and end times specify the start and end times of the clip taken from the original video, If the start time is less than the end time the video will be played forward. If the start time is after the end time the video will be played backward (from the end time to the start time). In the screenshot above the first edit plays the video forwards from the start to 3 seconds into the video and then plays the video backwards from 3 seconds back to the start:
| 1. | start time=0, end time= 3, start speed=1, end speed=2 |
| 2. | start time=3, end time= 0, start speed=2, end speed=1 |
The start and end speeds specify the speed of playback of the clip. If the start and end speeds are set to the same value the clip will be played at a constant speed. If the start and speeds are set to different values the playback speed will change smoothly from the start speed to the end speed. In the screenshot above the first clip will start at normal speed and will gradually speed up to 2x normal speed by the end of the clip. The second clip will start a 2x speed and gradually ramp down to normal speed at the end of the clip.
Jump cuts can be added by adding clips with different start and end times e.g. to play the first two seconds of the video twice: once at normal speed and then again at double speed you could add two clips:
| 3. | start time=0, end time= 2, start speed=1, end speed=1 |
| 4. | start time=0, end time= 2, start speed=2, end speed=2 |
Right click on a clip in the edit list to edit, delete or change its position in the list or to insert a clip before or after it. You can also double click on a clip to edit it.
New clips can be added to the edit list by clicking on the "Add clip..." button:
A video edit list can be saved to file for future reference or copying to another event by clicking on the "Export..." button. Click on the "Import..." to load a video edit list.
Note: Selecting the custom edit, boomerang option, setting the number of loops to 1 or changing the playback speed will disable audio capture because it would sound strange if played backwards or at a different speed.
A static overlay can be added to the video by placing a PNG file named video_overlay.png in the photo booth images folder. The transparency of the overlay can be controlled using an alpha channel in the PNG file. The overlay does not need to be the same size as the processed video and will be placed in the top left corner of the video. If it is smaller than the video it won't cover the whole video. If it is larger than the video it will be cropped to fit.
A video overlay can be added to the video by creating an Apple ProRes4444 video with transparency information in the alpha channel and saving it with the name video_overlay.mov in the photo booth images folder.
An optional introductory video can be added to the start of the processed video by placing an MP4 video named video_intro.mp4 in the photo booth images folder.
An optional closing or credits video can be appended to the end of the processed video by placing an MP4 video named video_outro.mp4 in the photo booth images folder.
Note: The intro and outro videos must be the same size as the processed video. If they are different sizes they will be discarded
Audio from the intro and outro videos will only be included if the original video has audio and is played back once at normal speed. Audio from the intro or outro videos will be discarded if the video is edited or does not contain audio.
Place an MP3 audio file named video_soundtrack.mp3 in the photo booth images folder to add an soundtrack to the video. This will replace the audio captured with the original video and in the intro or outro videos. The MP3 soundtrack must be at least as long as the processed video otherwise the final video will be cut short to the length of the MP3 file. If the MP3 file is longer than processed video it will be cut short to match the duration of the processed video.
The MP3 soundtrack will be added from the start of the intro video, if present, and will continue through the playback of the processed video and then during the outro video, if present.
The time it takes to process the video depends upon a number of factors:
| 1. | The camera video settings and the length of the captured video. This will affect the size of the original video file and the time it takes to download it via USB to the PC after capture. A Canon EOS M50 camera capturing 720p at 60fps takes approximately half the clip duration to download e.g. a 6 sec capture will take approximately 3 secs to download. |
| 2. | The processor speed of the computer and the number of edits and whether an intro or outro video is added. The speed of the computer's storage will also affect the processing speed. SSD storage is normally faster than conventional hard disks. A typical video edit may take between half the duration of the final video to edit. |
A fast, recent computer with an i5 or i7 processor and an SSD is recommended for the fast processing of videos. The main factor is the speed of the processor and the computer's storage. Increasing the amount of RAM above 4 or 8GB will have little or no effect on the processing speed.
Any errors or warnings generated during the postprocessing are automatically logged to a file named DSLRRemotePro.log in your Documents folder. Please check this log file for errors if the video postprocessing is not producing the expected results.
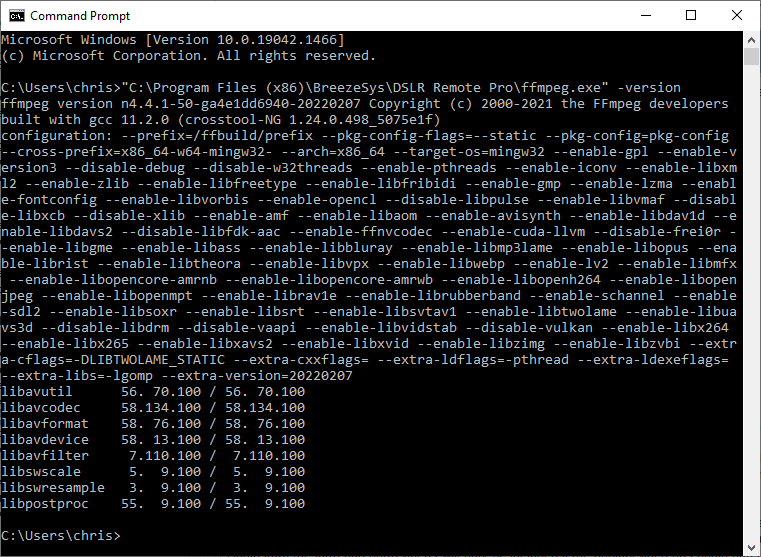
Sometimes antivirus software can interfere with the postprocessing by blocking a command line utility called ffmpeg.exe. You can check whether ffmpeg.exe is working by opening a Windows PowerShell or Command Prompt window and typing the following command line:
"C:\Program Files (x86)\BreezeSys\DSLR Remote Pro\ffmpeg.exe" -version
If it is working you should get output similar to this:
Please check your antivirus settings if ffmpeg.exe isn't working.
Slow Motion Video
Slow motion video can be captured using the Canon EOS R6, Canon EOS R5, Canon EOS M50, Canon EOS M6 Mark II, Canon EOS M200, Canon PowerShot G5X Mark II or Canon PowerShot G7 Mark III by selecting high frame rate 120fps video. When this setting is used the video will be captured at 120fps without sound and is saved at 30fps giving playback at 1/4 normal speed.
To select 120 fps slow motion video capture disconnect the USB cable connecting the camera to the computer and set the exposure mode dial on the camera to the movie setting. Then go to the tools section of the camera settings and check that "Video system" is set to "For NTSC". Then go to the camera menu and select "Movie rec quality" and enable "High Frame Rate". Set the exposure mode dial back to its original setting (P, Av, Tv or M) and reconnect the USB cable. Unfortunately Canon don't provide a way for selecting slow motion video remotely from a computer and you need to select it manually using the camera's menus.
Currently the Canon EOS R6, Canon EOS R5, Canon EOS M50, Canon EOS M6 Mark II, Canon EOS M200, Canon PowerShot G5X Mark II and Canon PowerShot G7 Mark III are the only Canon cameras that can be used to capture 120fps video.
Other camera models can capture video at up to 60fps which can be played back at a slower rate (e.g. 1/4 normal speed by setting the video playback rate to 25), but this won't give as good quality as the Canon EOS M50 capturing at 120fps. Also, the videos are saved at 60fps and need to be post processed to create a slow motion copy without sound.
Green Screen
Select the "Enable green screening of live view images" option to shoot green screen videos. Then type Ctrl+G in full screen photo booth mode to adjust the green screen settings (please see the section on green screen shooting for more information). In full screen video booth mode the green screen background and overlay images are loaded from the photo boothimages folder. The background image should be named video_greenscreen_background.jpg or greenscreen_background.jpg and the overlay image should be named video_greenscreen_overlay.png or greenscreen_overlay.png. The software will look for video_greenscreen_background.jpg and video_greenscreen_overlay.png first and use these if available. If they are not available it will look forgreenscreen_background and greenscreen_overlay.png images.
Backgrounds and overlays can also be switched by saving a number of different profiles each using a different photo booth images folder containing different greenscreen_background.jpg and greenscreen_overlay.png images. The user can then select the different backgrounds using the profile shortcut keys. You can also switch green screen backgrounds and overlays by copying the new greenscreen_background.jpg and greenscreen_overlay.png images into the photo booth images folder while the booth is running.
Please note: In video booth mode green screening is only applied to the live view images displayed to the user. It is not applied to the movie files downloaded from the camera or during video playback. You will need additional third party software to green screen the movie files after they have been downloaded to the PC (DSLR Remote Pro automatically downloads the movie files to the PC).
Capturing a Series of Still Photos to Create an Animated GIF
Video booth mode can also be used to capture a series of still photos which can be combined to create an animated GIF which plays in a continuous loop. The animation can play the clip continuously, repeating from the start (e.g. frames 1, 2, 3, 4, 5 then frames 1, 2, 3, 4, 5 again) or it can play the clip forwards then backwards (e.g. frames 1, 2, 3, 4, 5, 4, 3, 2, 1, 2, 3, 4, 5 etc.).
The still frames are captured from the live view display and will be green screened if "Enable green screening of live view images" is selected. The size of saved photos will depend on the resolution of the live view images for the camera being used. Recent Canon DSLRs have a live view resolution of 960x640 pixels.
To enable this select the "Capture clip as a series of still frames (without sound)" option. Then select the number of frames to capture in the sequence. Setting the number of frames to between 5 and 10 works well for a 1 sec or 2 sec clip. A higher value will give a smoother animation but will result in a larger file size. A smaller value may cause the clip to appear as a series of jumps from frame to frame rather than as an animation.
The "Capture rate (frames/capture)" setting specifies how often the live view frames should be saved. The live view frame rate is approximately 12 frames/sec, but this may depend on the camera model and the speed of the computer. Setting the capture rate to 5 frames/capture will capture a frame approximately every 0.4 secs. The duration of the clip depends on the live view frame rate, the capture rate and the number of frames to capture e.g. with a live view frame rate of 12fps, capturing a total of 6 frames at a rate of one frame every 5 live view frames the clip would take 6 * 5 / 12 = 2.5 secs.
Select the "Display playback screen after capturing video" option to play back the clip after capture. The playback rate is specified as the time each frame is displayed in 1/100 sec e.g. setting this to 8 will play the clip back at approximately normal speed (approx 12fps), 16 will play it back in approximately half speed slow motion (approx 6 fps) etc.
Examples:
Number of frames to capture=10, capture rate=5, playback rate=40. This will capture a clip lasting approximately 4 secs and play it back at normal speed
Number of frames to capture=10, capture rate=1, playback rate=40. This will capture a clip lasting approximately 1 sec and play it back in slow motion lasting about 4 secs
Number of frames to capture=10, capture rate=5, playback rate=10. This will capture a clip lasting approximately 4 sec and play it back at high speed lasting about 1 sec
Normally the clip is played back in the forward direction in a loop e.g. frame 1, 2, 3, 4, 5, 6, 7, 8, 9, 10, 1, 2, 3, 4, 5, 6, 7, 8, 9, 10, 1, 2, 3 etc.
Select the 'Forward/reverse "ping-pong" playback' option to play the clip forwards then backwards before repeating e.g. frame 1, 2, 3, 4, 5, 6, 7, 8, 9, 10, 9, 8, 7, 6, 5, 4, 3, 2, 1, 2, 3, 4, 5, 6, 7, 8, 9, 10, 9, 8, 7 etc.
If the user accepts the clip in the playback screen the captured live view images are saved as JPEG files together with an XML video booth summary file. The XML summary file contains the following information:
<?xml version="1.0" encoding="UTF-8"?>
<breeze_systems_photobooth version="3.5">
<video_information>
<date>2016/05/04</date>
<time>13:50:24</time>
<photos>
<photo image="1">FYQ65498_0001_01.JPG</photo>
<photo image="2">FYQ65498_0001_02.JPG</photo>
<photo image="3">FYQ65498_0001_03.JPG</photo>
<photo image="4">FYQ65498_0001_04.JPG</photo>
<photo image="5">FYQ65498_0001_05.JPG</photo>
<photo image="6">FYQ65498_0001_06.JPG</photo>
<photo image="7">FYQ65498_0001_07.JPG</photo>
<photo image="8">FYQ65498_0001_08.JPG</photo>
</photos>
<evf_interval_ms>80</evf_interval_ms>
<num_frames>10</num_frames>
<capture_freq>5</capture_freq>
<image_delay>10</image_delay>
<ping_pong_playback>1</ping_pong_playback>
<title_delay>100</title_delay>
<title_at_end>100</title_at_end>
<ping_pong_playback>1</ping_pong_playback>
<gif_frame_width>500</gif_frame_width>
<gif_frame_height>500</gif_frame_height>
<gif_x_offset>50</gif_x_offset>
<gif_y_offset>25</gif_y_offset>
<gif_file>GIF\FYQ65498_0001_01.GIF</gif_file>
<gif_frames_subfolder>GIF_frames</gif_frames_subfolder>
<user_data></user_data>
<photobooth_images_folder>C:\Users\Chris\Documents\PhotoboothImages\animated_gif_example</photobooth_images_folder>
</video_information>
</breeze_systems_photobooth>
Animated GIFs
Select the "Create animated GIF" option and and click on the "Animated GIF settings..." button set the animated GIF settings. Please see the Animated GIF section for details.
Select the "Use camera's photo mode" option to set the camera to photo mode when capturing the still images for the animated GIF. This will capture the images with the lens aperture set wide open with an image size of 960x640 pixels for most recent Canon cameras. If "Use camera's photo mode" is not selected the camera will be set to video mode with the lens aperture will be set to the current camera setting (e.g. if the exposure mode dial on the camera is set to Av and the aperture to f11 the aperture used during capture will be f11). The captured image size will be 1024x576 pixels for most recent Canon cameras in video mode.
Images Displayed to the User
The following screen images are displayed to the user at different stages of the video capture:
video_ready.jpg - displayed when the video booth is ready to capture the next clip
video_countdown.jpg - displayed together with the countdown text during the countdown before capturing the clip
video_capture.jpg - displayed together with a progress bar while the video clip is being captured
video_processing.jpg - displayed after video capture while the movie file is being transferred to the PC
video_playback.jpg - displayed when playing back the video that has just been captured
video_playback_finished.jpg - optional screen image displayed after playback or after downloading the video if auto playback is not enabled
GIF_processing.jpg - optional screen displayed when creating animated GIFs in video mode
The images displayed to the user should be the same size or bigger than the computer's display. If the images are too small they will be expanded to fit with a black border and a small warning message will be displayed in the bottom left corner showing the image size and the display size.
Audio prompts can be added by placing a WAV sound file in the photo booth images folder and giving it the same name as prompt screen. For example to play a sound when the video booth is ready copy a WAV file named video_ready.wav into the photo booth images folder and it will be played when the video_ready.jpg image is displayed.
In Operation
Once everything is setup simply run DSLR Remote Pro for Windows and press Ctrl+F4 to enter full screen mode and display the ready screen. If the "Startup in video booth mode when selecting full screen photo booth" is not set the window will start in photo booth mode. You can switch between photo booth mode and video booth mode by using a touchscreen actions or typing Ctrl+V to select video booth mode and Ctrl+P to select photo mode. In video booth mode the video capture sequence can be started using a touchscreen action or by pressing F7. The user can use a touchscreen action or press the "End" key to stop the recording part way through or wait until it reaches the specified duration setting and stops automatically.
When the video playback screen is displayed the user play the video again, accept the video or reject it using touchscreen actions or keyboard shortcuts. Please see keyboard shortcuts for a complete list of keyboard shortcuts.
The user must either accept or reject the video before the booth will return to the ready screen. When the user rejects the video to movie file is deleted and is not saved on the camera's memory card or the PC's hard disk. There is a default timeout of 300 secs after which time the video will be automatically accepted. This timeout can be set in the video booth settings dialog.
If "auto reconnect" is selected from the "Camera" menu the camera can be turned off when not in use and then turned it back on again to automatically restart photo booth operation. When the camera is turned off the camera_not_connected.jpg screen is displayed and when it is turned back on again the ready screen is displayed.
To exit full screen photo booth mode either press the Esc key or hold down the SHIFT key and press the left mouse button.