The camera settings can be changed by tapping on the "Camera" menu button in the startup screen or by tapping the "Adjust camera settings" touchscreen action, if defined, when running an event.
The camera settings screen will be displayed showing the live view from the currently selected camera with controls for adjusting the settings at the bottom:
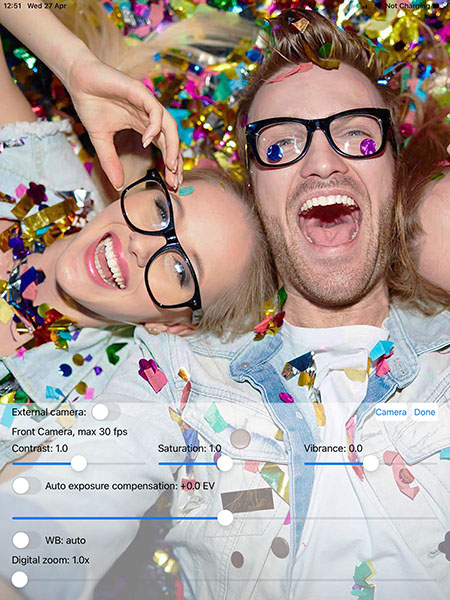
Breeze Booth can use the rear facing or front facing cameras. Tap "Camera" to cycle through the various cameras. The name of the current selected camera and its maximum available frame rate when capturing video is displayed below the "Camera" button. The range of available cameras will depend upon the device. Most iPads apart from Pro models from 2021 onwards and basic iPhones have a single front camera and a single back camera. Recent iPad Pros and iPhones have two or three back cameras which can be treated as separate cameras (e.g. "Back Ultra Wide Camera", "Back Camera", "Back Telephoto Camera") or as a single virtual camera (e.g. "Back Dual Wide Camera"). The individual cameras have faster maximum frame rates when capturing video than the virtual camera and should be used if you are capturing slow motion videos. The virtual camera is useful if you want to be able to zoom seemlessly from the widest camera through to the most telephoto camera.
The maximum available frame rate for video capture depends upon the device and the selected camera. Recent devices support video capture at up to 240 fps with the back cameras and 60 fps with the front camera. Older devices only support 30 fps with the front camera and 120 fps with the back camera.
Alternatively you can use a Canon camera connected to an external controller by selecting "external camera". Please see the "Using an external camera" section for details.
The contrast, saturation and vibrance sliders can be used to adjust the appearance of the camera images. The saturation slider adjusts the strength of the colors in the image and ranges from 0, which has no color and gives grayscale images, through 2 which gives highly saturated images. The vibrance setting adjusts the saturation of an image while keeping pleasing skin tones. The default settings are contrast=1.0, saturation=1.0 and vibrance=0.0.
Normally the camera uses auto exposure and this can be adjusted using the auto exposure compensation slider. For manual control of the exposure tap the switch to the left of "Auto exposure compensation" and it will change to "Shutter speed" and the ISO slider will be displayed. Adjust exposure by moving the shutter speed and ISO sliders.
Note: It's best to avoid slow shutter speeds (e.g. less than 1/15 sec) otherwise the live view refresh rate may be slow.
Normally the camera selects the white balance automatically. For manual control tap the switch to the left of the "WB: auto" caption and adjust the white balance using the WB and Tint sliders.
The camera can be digitally zoomed in using the "Digital zoom" slider. Please note that this works by cropping the photos and will reduce the resolution and the amount of detail available. If the photos are zoomed in too far it may affect the quality and the photos may appear pixellated.
Tap the "Done" button or anywhere in top half of the screen to close the camera settings screen.
Touchscreen Actions
The exposure compensation and digital zoom settings can also be adjusted by defining touchscreen actions in the ready or menu screens. This makes it possible to give users control over basic camera settings without needing to give access to the full set of camera settings which may cause confusion or lead to less than optimal settings being selected.