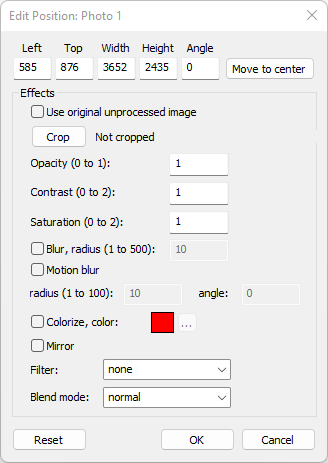
Print compositing refers to effects that can be applied to photos when they are added to a print layout. These include opacity, blur, motion blur, colorizing, blend modes, contrast and saturation. To add or edit the effects applied to a photo right click on the photo in the print layout editor and select "Edit image position and effects...":
Most effects work best when used with AI background removal or green screen with the transparent background option but can also be used with normal photos.
The "Use original unprocessed image" setting to use the original image taken by the camera before any processing such as green screen, AI background removal and AI special effects. This is useful if you want to show "before" and "after" images.
Click on the "Crop" button to crop the photo:
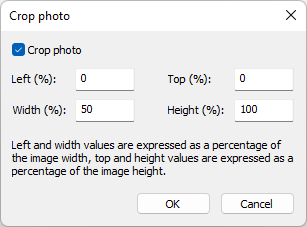
The left and width cropping values are expressed as a percentage of the image width e.g. to crop the image to display the left half set left to 0 and width to 50. Or to crop the image to display the right half set left to 50 and width to 50.
The top and height cropping values work in a similar way and are expressed as a percentage of the image height.
When an image is cropped its placement in the print layout editor does not change. Instead, the areas of the image that are cropped out are made fully transparent.
The opacity setting controls the transparency of the photo. Set this to a value between 0 (fully transparent) to 1 (fully opaque).
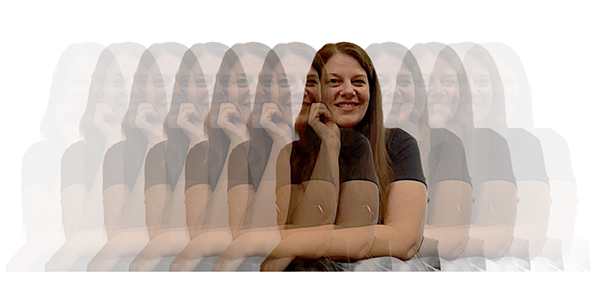
Example of a single photo being added to the print layout multiple times with different opacity settings
The contrast setting adjusts the contrast of the photo. Set this to a value between 0 and 2 where 0 is no contrast (i.e. black), 1 is no adjustment and 2 is high contrast.
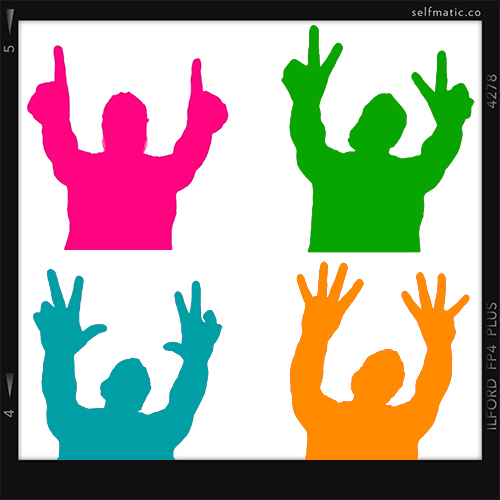
Setting the contrast to 0 will produce a silhouette when used with AI background removal or green screen with the transparent background. This can produce interesting effects when used with the colorize option e.g.
The saturation setting adjusts the saturation of the photo. Set this to a value between 0 and 2 where 0 is fully desaturated producing a B&W image, 1 is no adjustment and 2 is highly saturated. Faded effects with subdued colors can be created by setting the saturation to less than 1.
The blur option applies gaussian blur to the photo. Select this option then edit the blur radius to control the amount the photo is blurred.
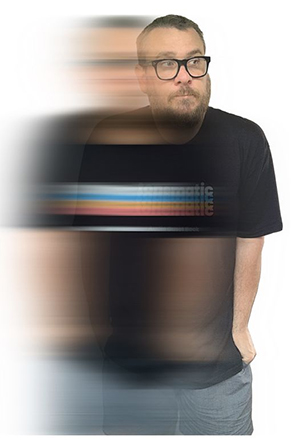
The motion blur option blurs the photo in a linear direction to give the impression of motion. Select this option and then edit the radius to control the length of the motion blur. Edit the motion blur angle to adjust the angle of the blur (the angle is in degrees).
Placing a photo with motion blur on top of the original photo can produce interesting effects e.g.
The colorize option provide a simple way to convert a photo into shades of a single color. Enable the colorize checkbox then click on the "..." button to the right of the color swatch to change the color used to colorize the photo.
The mirror option simply mirrors the image by flipping it horizontally.
The filter dropdown list allows a color lookup table (or LUT) to be applied the the photo. Please see the section on filters for information on how to create filters.
The blend mode controls how the photo is blended with the print layout.
The following blend modes are available:
normal, multiply, screen, darken, lighten, dissolve, color burn, linear burn, darker color, lighter color, color dodge, linear dodge, overlay, soft light, hard light, vivid light, linear light, pin light, hard mix, difference, exclusion, hue, saturation, color, luminosity, subtract, division
A detailed description of each blend mode is beyond the scope of this help file. Please see this wikipedia article for more information about blend modes: https://en.wikipedia.org/wiki/Blend_modes. Alternatively use an image editor such as Photoshop that supports levels and blend modes to see the effect of different blend modes on overlays applied to photos.
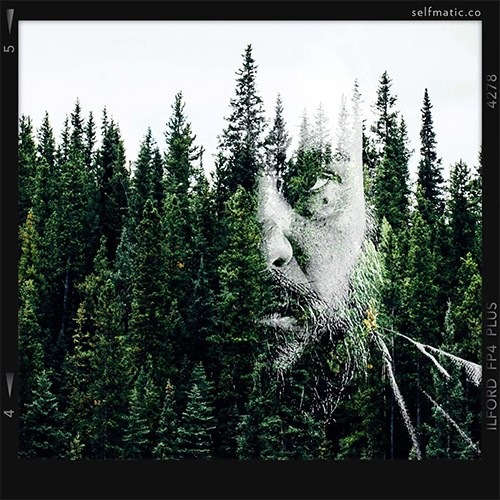
Print layout with trees as the background and one photo taken with AI background removal
which is added to the print layout with darken blend mode.
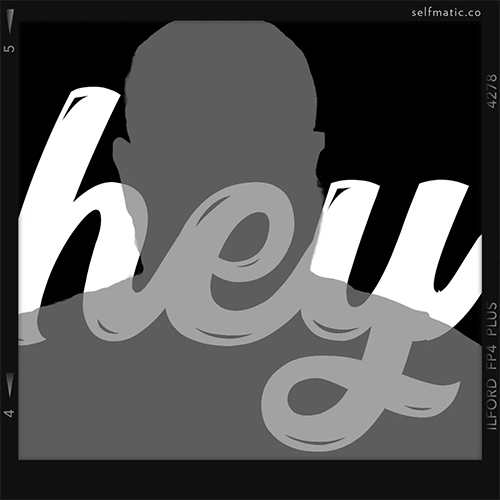
Photo taken with AI background removal then added to the print layout with contrast set to 0
and colorized to create a gray silhouette. Then added the "hey" overlay using a blend mode.